|
|
Calibration
To determine the credibility of studies by AFM — microscopy testing and calibration of microscope work and test the quality of probes (scale of X-, Y-, Z - coordinates, the radius of the tip of the cantilever, linearity and orthogonality of the axes of the scan). For calibration and determination of the working shapes of the probes used special test structures with known topography.  TGS1F
TGS1F
Set of 4 calibration gratings for AFM lateral and vertical calibration, detection of lateral non-linearity. Calibration grating set TGS1 for Z and X (or Y) calibration. Step heights: 20±1.5nm, 110±2nm, 520±3nm, 1517±20nm.
€720
 TGS1F
TGS1F
Set of 4 calibration gratings for AFM lateral and vertical calibration, detection of lateral non-linearity. Calibration grating set TGS1 for Z and X (or Y) calibration. Step heights: 20±1.5nm, 110±2nm, 520±3nm, 1517±20nm.
€720
 TGSFull
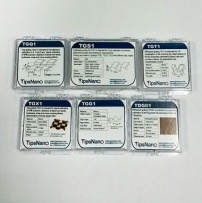
Set of calibration standards for AFM lateral and vertical calibration (including simultaneuos calibration in X, Y and Z directions) , detection of lateral non-linearity, hysteresis, creep, and cross-coupling effects, determination of the tip shape.
€1 590
 TGSFull
Set of calibration standards for AFM lateral and vertical calibration (including simultaneuos calibration in X, Y and Z directions) , detection of lateral non-linearity, hysteresis, creep, and cross-coupling effects, determination of the tip shape.
€1 590
 TGS1_PTB
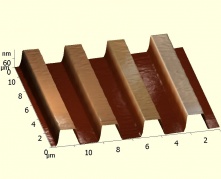
Calibration grating set TGS1 (consists of three gratings TGZ1, TGZ2, TGZ3) with PTB tracable certificate. Step heights: 20±1.5nm, 110±2nm, 520±3nm.
€1 200
 TGS1_PTB
Calibration grating set TGS1 (consists of three gratings TGZ1, TGZ2, TGZ3) with PTB tracable certificate. Step heights: 20±1.5nm, 110±2nm, 520±3nm.
€1 200
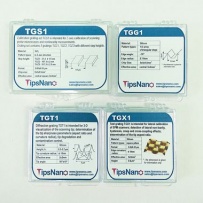 TGS2
TGS2
Set of 6 calibration gratings for SPM lateral and vertical calibration, detection of lateral non-linearity, hysteresis, creep, and cross-coupling effects, determination of the tip shape.
€1 290
 TGS2
TGS2
Set of 6 calibration gratings for SPM lateral and vertical calibration, detection of lateral non-linearity, hysteresis, creep, and cross-coupling effects, determination of the tip shape.
€1 290
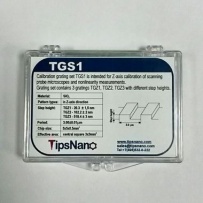 TGS1
TGS1
Set of 3 calibration gratings for AFM lateral and vertical calibration, detection of lateral non-linearity. Calibration grating set TGS1 for Z and X (or Y) calibration. Step heights: 20±1.5nm, 110±2nm, 520±3nm.
€420
 TGS1
TGS1
Set of 3 calibration gratings for AFM lateral and vertical calibration, detection of lateral non-linearity. Calibration grating set TGS1 for Z and X (or Y) calibration. Step heights: 20±1.5nm, 110±2nm, 520±3nm.
€420
 SiC/0.75
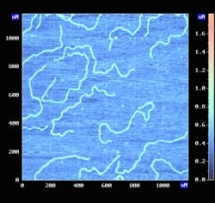
6H-SiC(0001) based calibration sample for Z-axis AFM scanner calibration in subnanometer intervals.
€240
 SiC/0.75
6H-SiC(0001) based calibration sample for Z-axis AFM scanner calibration in subnanometer intervals.
€240
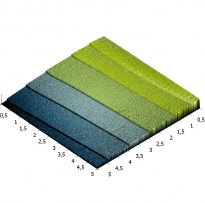 SiC/1.5
6H-SiC(0001) based calibration sample for Z-axis AFM scanner calibration in several nanometer intervals.
€240
 SiC/1.5
6H-SiC(0001) based calibration sample for Z-axis AFM scanner calibration in several nanometer intervals.
€240
 TGSFull+
Full set of calibration standards for AFM lateral and vertical calibration (including submicron calibration and simultaneuos calibration in X, Y and Z directions) , detection of lateral non-linearity, hysteresis, creep, and cross-coupling effects, determination of the tip shape.
€1 840
 TGSFull+
Full set of calibration standards for AFM lateral and vertical calibration (including submicron calibration and simultaneuos calibration in X, Y and Z directions) , detection of lateral non-linearity, hysteresis, creep, and cross-coupling effects, determination of the tip shape.
€1 840
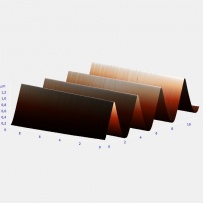 TGG1
TGG1
Calibration grating TGG1 for SPM calibration in X or Y axis, detection of lateral and vertical scanner nonlinearity, tip sharpness characterization.
€200
 TGG1
TGG1
Calibration grating TGG1 for SPM calibration in X or Y axis, detection of lateral and vertical scanner nonlinearity, tip sharpness characterization.
€200
 TGZ1
TGZ1
Calibration grating TGZ1 for Z and X (or Y) calibration. Step height 20,0±1.5nm.
€170
 TGZ1
TGZ1
Calibration grating TGZ1 for Z and X (or Y) calibration. Step height 20,0±1.5nm.
€170
 TGZ2
TGZ2
Calibration grating TGZ2 for Z and X (or Y) calibration. Step height 110 ± 2nm.
€170
 TGZ2
TGZ2
Calibration grating TGZ2 for Z and X (or Y) calibration. Step height 110 ± 2nm.
€170
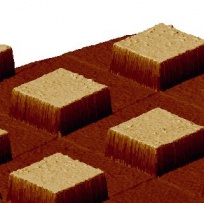 TGQ1
TGQ1
Calibration grating TGQ1 for simultenious calibration in X,Y,Z directions. Step height 20±3nm.
€350
 TGQ1
TGQ1
Calibration grating TGQ1 for simultenious calibration in X,Y,Z directions. Step height 20±3nm.
€350
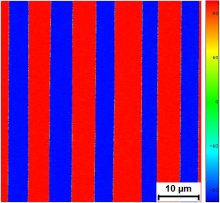 PFM03
PFM03
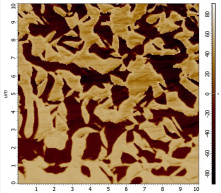
Test Pattern for the Piezoresponse Force Microscopy, periodically poled lithium niobate.
€450
 PFM03
PFM03
Test Pattern for the Piezoresponse Force Microscopy, periodically poled lithium niobate.
€450
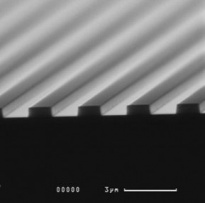 TGZ4
TGZ4
Calibration grating TGZ4 for Z and X (or Y) calibration. Step height 1517±20nm.
€340
 TGZ4
TGZ4
Calibration grating TGZ4 for Z and X (or Y) calibration. Step height 1517±20nm.
€340
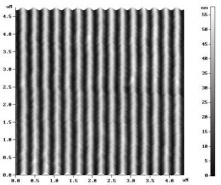 TDG01
TDG01
Calibration grating TDG01 for AFM submicron calibration in the X or Y direction. Period is 278nm.
€300
 TDG01
TDG01
Calibration grating TDG01 for AFM submicron calibration in the X or Y direction. Period is 278nm.
€300
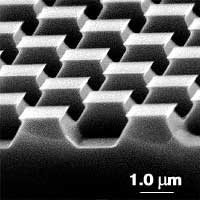 TGX1
TGX1
Calibration grating TGX1 for lateral scanner calibration, detection of lateral non-linearity, hysteresis, creep, and cross-coupling effects, determination of the tip sharpness.
€250
 TGX1
TGX1
Calibration grating TGX1 for lateral scanner calibration, detection of lateral non-linearity, hysteresis, creep, and cross-coupling effects, determination of the tip sharpness.
€250
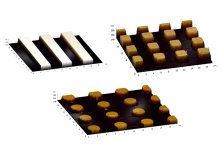 TGL1
TGL1
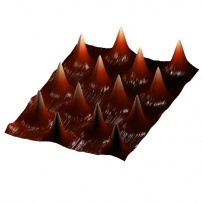
Calibration grating TGL1 for 2-D and 3-D calibration with three periods - 6um,10um, 20um, three structures - lineas, pillars, circles. Step height 168nm.
€350
 TGL1
TGL1
Calibration grating TGL1 for 2-D and 3-D calibration with three periods - 6um,10um, 20um, three structures - lineas, pillars, circles. Step height 168nm.
€350
show more |
| © TipsNano 2025 |
Tipsnano OÜ, Kristiina 15-214, Tallinn 10131, Estonia show map |
sales@tipsnano.com feedback |


